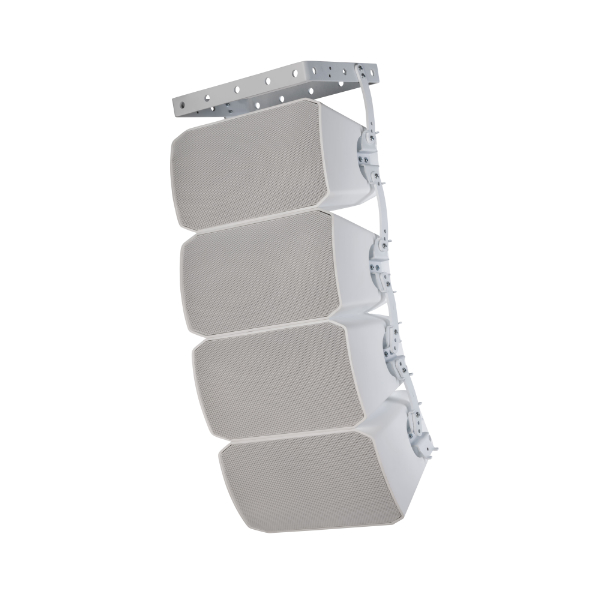
3-step assembly: first mounting the speakers with the flying frame, then fixing the safety cable, and finally mounting the flying frame (arrays) on the ceiling.
- Use 4 DS 100 loudspeakers and place them on a scratch-resistant surface. Take the M6x14 screws, the eyebolt and the washer out of the package.
- Open the array bracket set. Remove the mounting material and the components from the Array Bracket Set.
- Equip each DS 100 loudspeaker with 2 T-connectors and 4x M6x14 screws each.
- Stand the DS 100 loudspeakers upright.
- Use the 3 long lateral brackets and M6x14 screws to secure each side of the array. Ensure proper alignment and use the appropriate holes according to the desired configuration.
- Then use the smaller brackets and M6x14 screws to attach the flying frame.
- Rotate the mounting components 180° and repeat the steps until the mount is fully assembled.
- Screw 4 eyebolts into the flying frame.
- Screw 4 eyebolts with the washers into the backs of the speakers.
- Install the securing steel cable now. You will need pliers and an SW7 screwdriver. Attach the steel cable to the flying frame, making sure to pass it through each speaker's eyebolt.
- For the final ceiling mounting, fix the entire array bracket with suitable mounting material to the ceiling.